This article demonstrates the IGB plug-able architecture using a simple example plugin that adds a menu item to the IGB Tools menu.
Overview
IGB runs within an OSGi framework, also called an OSGI "container" or "runtime." This means you can extend IGB without modifying the core IGB code base. By implementing a few well-described interfaces and using the Apache maven project management tool, you can add new menu items, create new kinds of tracks, or connect IGB to all-new data sources - all without re-installing or even re-starting IGB.
This tutorial introduces the IGB platform by demonstrating a very simple IGB App that adds a new entry to the IGB Edit menu.
Get started: clone IGB Hello World App
Clone the IGB Hello World App project - this contains complete, working example of the Hello World IGB App:
git clone https://bitbucket.org/lorainelab/igb-app-hello-world.git
Compile the App
Next, open the igb-app-hello-world project in Netbeans.
Select the Hello World IGB App in the Netbeans Projects tab, right-click, and select and then select Run > Build.
Building the App will create a new directory named "target" which can serve as a new App repository. This new directory contains compiled code as well as a meta-data about the App it contains.
Add target directory as new App repository
Normally, Apps are deployed on-line in a Web-accessible location called an "App Store." This enables multiple users to install and run them.
However, you can also deploy an App Store on your local computer - useful for developing and testing new Apps.
To add your target directory as a local App Store:
- Start IGB
- Select Tools > Open App Manager
- Click Manage Repositories... button (opens Plug-in Repositories tab in Preferences window)
- Click Add... button (opens Plugin Repository dialog)
- Enter a name for your repository (can be anything)
- Click Choose local folder button
- Select the "target" folder in your igb-app-hello-world project folder.
Once you add "target" as a new local App store, you should see the Hello World App added as a new App in the IGB App Manager window, as show below:
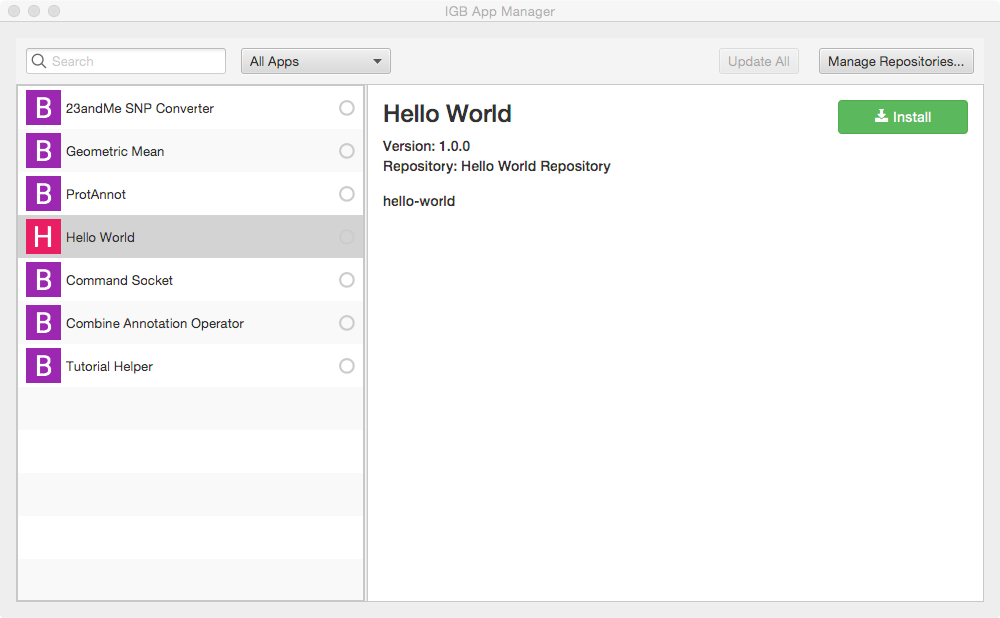
Install App
To install the hello world App:
- Select Tools > Open App Manager
- Select the App
- Click Install
To check that installation worked correctly, select the Edit menu. Check that there is now a new menu item named Hello World App.
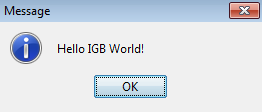
Run App
To run the App:
- Select Edit > Hello World App
- Observe a dialog appears containing the message "Hello IGB World!
Next step: Modify your code
Open the file MenuBarExpansionExample.java in the Netbeans editor. Edit the message your IGB App prints and re-build your App. Then, return to the IGB App Manager, un-install and then re-install your App. When you select the the menu item again, a dialog should appear showing your new message.
Note that you can rapidly repeat this edit-build-uninstall-install cycle. You don't have to re-build IGB or even restart it, which makes development much faster than if you had to modify the IGB code directly.
Next step: Make README.md for your App (optional)