General Function Checklist
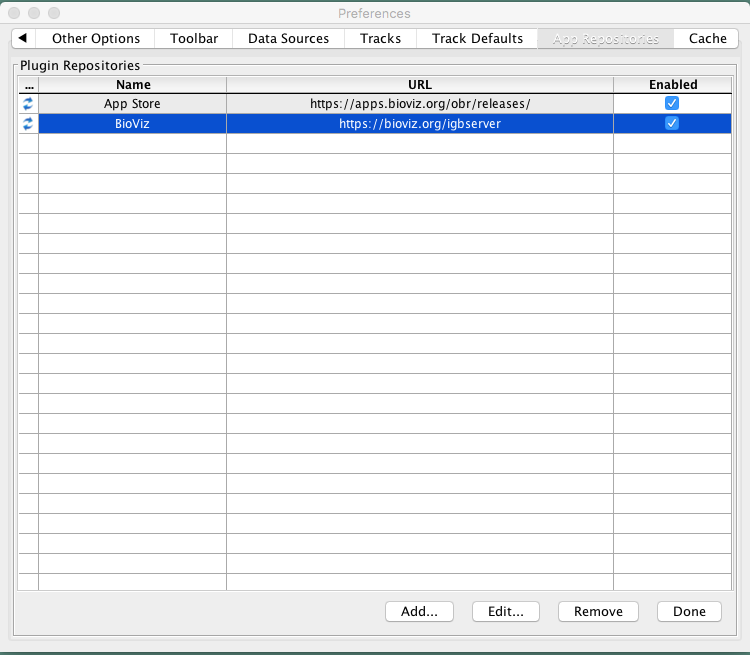
- All Default App Repositories appear in the App Repositories table (within IGB Preferences).
- Mac: The table matches the image below (Both server should be enabled)
- Windows: The table matches the image below (Both server should be enabled)
- Linux: The table matches the image below (Both server should be enabled)
- It is possible to add an additional app repository to the repository list
- Click the Add... button
- Enter a valid app repository name and URL. (For example, https://bitbucket.org/lorainelab/merge-annotation-operator/downloads/ contains an App jar file and OBR index file that makes this URL a valid App repository.)
- Click the Add... button
- Click Submit
- Mac: confirm the repository is added to the repository table and that the same name you entered is shown.
- Windows: confirm the repository is added to the repository table and that the same name you entered is shown.
- Linux: confirm the repository is added to the repository table and that the same name you entered is shown.
- Select the Plug-ins tab at the bottom of IGB.
- Mac: There is a button with the text Launch App Manager (see below).
- Windows: There is a button with the text Launch App Manager (see below).
- Linux: There is a button with the text Launch App Manager (see below).
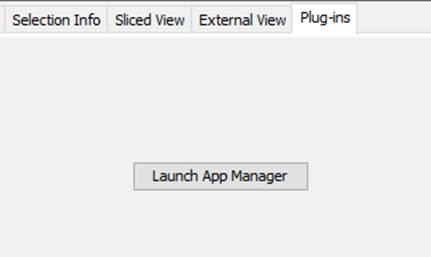
- Click Launch App Manager.
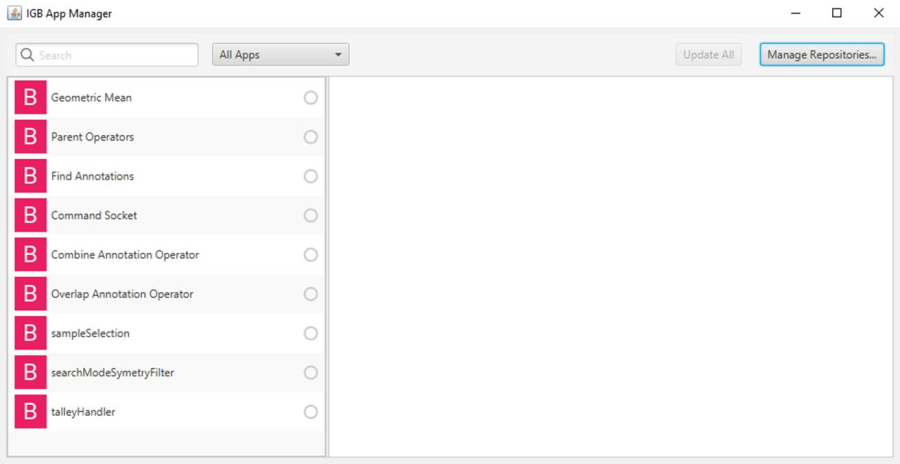
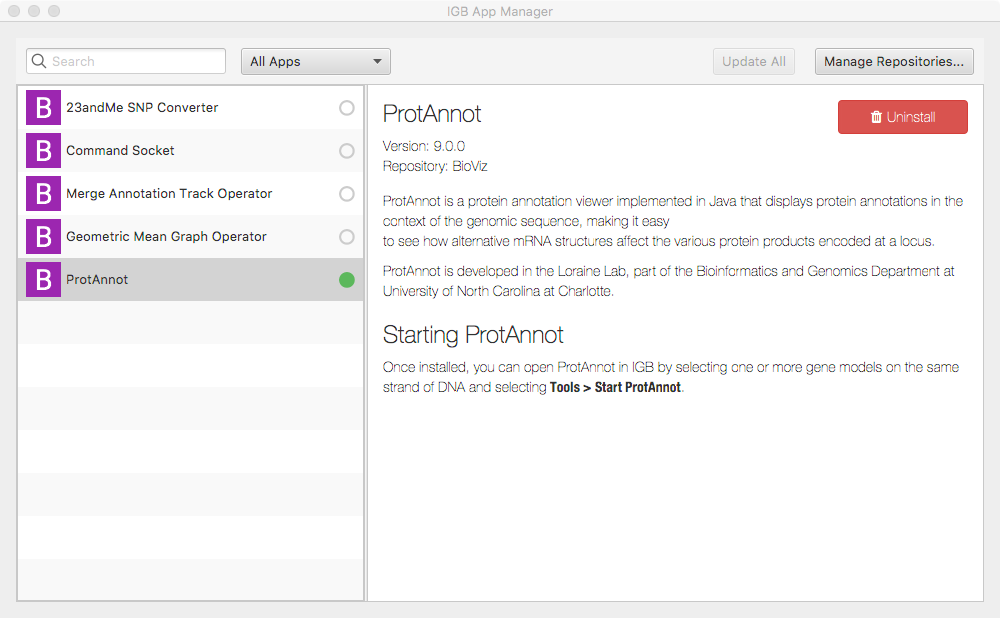
- Mac: The IGB App Manager should open and should look like the image seen below, but there may be different Apps available:
- Windows: The IGB App Manager should open and should look like the image seen below, but there may be different Apps available:
- Linux: The IGB App Manager should open and should look like the image seen below, but there may be different Apps available:
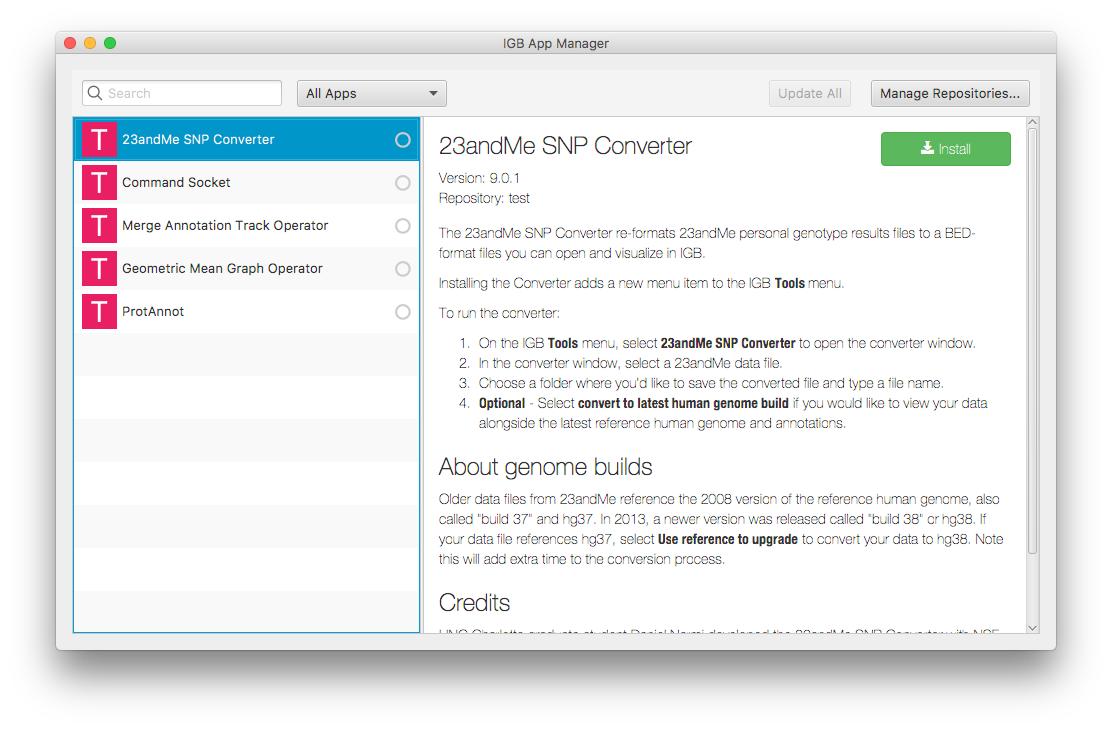
Note: Before selecting any of the plugins at the left, the area at the right is blank. The letter/color for any plugins that are present in both the default set and the test repository will change. By default it is a B for bioviz. If you name the test repository "Test" then they all change to a "T".
- Select the Manage Repositories… button (top-right corner of App manager).
- Mac: The App Repositories tab of IGB Preferences opens (see below).
- Windows: The App Repositories tab of IGB Preferences opens (see below).
- Linux: The App Repositories tab of IGB Preferences opens (see below).

- Select the checked checkbox under the Enabled column to disable the above added repo. Ensure the BioViz repo is enabled, and then click Done.
- Mac: The IGB App Manager lists the available BioViz apps and the color of the app's icon for the "Merge Annotation Track Operator" app changes to indicate that the repo added above isn't being used, as seen in the image below:
- Windows: The IGB App Manager lists the available BioViz apps and the color of the app's icon for the "Merge Annotation Track Operator" app changes to indicate that the repo added above isn't being used, as seen in the image below:
- Linux: The IGB App Manager lists the available BioViz apps and the color of the app's icon for the "Merge Annotation Track Operator" app changes to indicate that the repo added above isn't being used, as seen in the image below:
- View the IGB Console by selecting Help > Show Console and then install the Geometric Mean app by selecting it from the list in the App Manager and clicking the Install button.
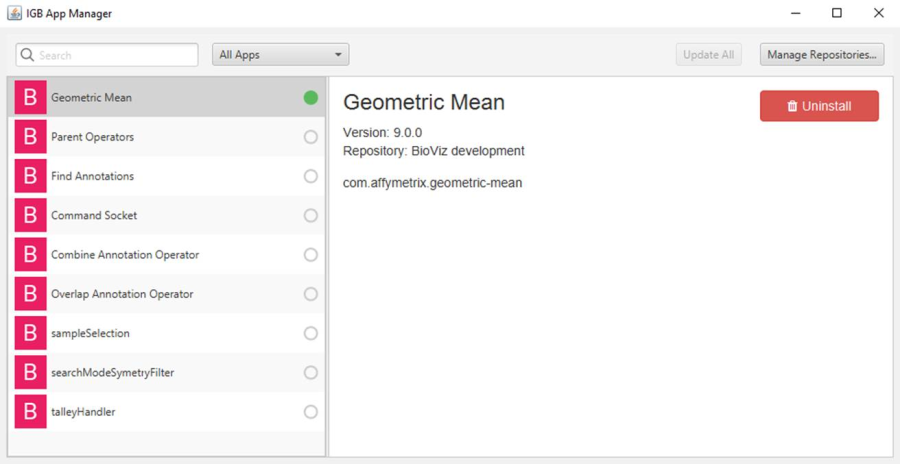
- Mac: The Install button toggles to read Uninstall upon clicking Install and there is a green dot next to the app in the list to indicate an installed status (see below).
- Windows: The Install button toggles to read Uninstall upon clicking Install and there is a green dot next to the app in the list to indicate an installed status (see below).
- Linux: The Install button toggles to read Uninstall upon clicking Install and there is a green dot next to the app in the list to indicate an installed status (see below).
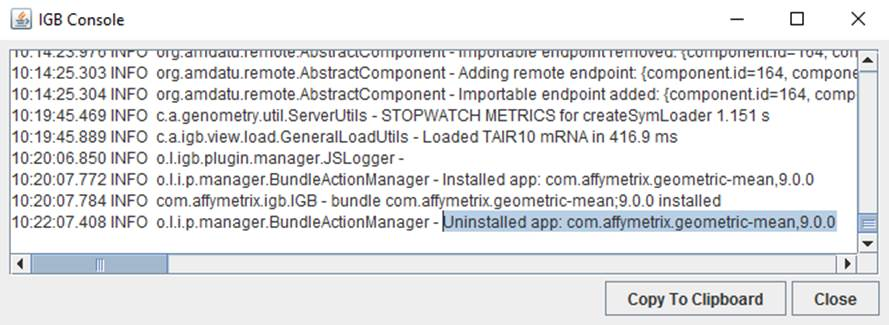
- Mac: The IGB Console will show a logging statement when the app is installed (see below).
- Windows: The IGB Console will show a logging statement when the app is installed (see below).
- Linux: The IGB Console will show a logging statement when the app is installed (see below).

- Now, uninstall the Geometric Mean app by clicking the Uninstall button in the IGB App Manager.
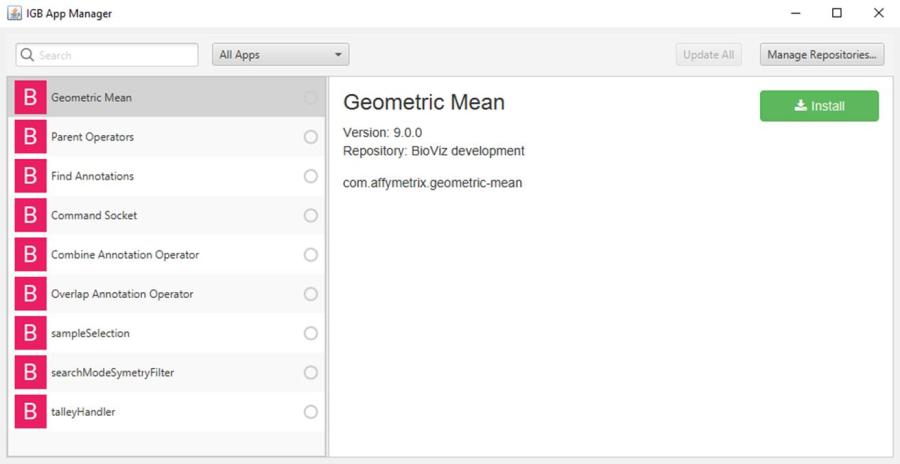
- Mac: The Uninstall button toggles to read Install upon clicking Uninstall and the green dot next to the app in the list that indicates the installed status is removed (see below).
- Windows: The Uninstall button toggles to read Install upon clicking Uninstall and the green dot next to the app in the list that indicates the installed status is removed (see below).
- Linux: The Uninstall button toggles to read Install upon clicking Uninstall and the green dot next to the app in the list that indicates the installed status is removed (see below).
- Mac: The IGB console will show a logging statement when the app is uninstalled (see below).
- Windows: The IGB console will show a logging statement when the app is uninstalled (see below).
- Linux: The IGB console will show a logging statement when the app is uninstalled (see below).
- Now install the ProtAnnot app by selecting it from the list in the App Manager and clicking Install.
- Mac: The Install button toggles to read Uninstall upon clicking Install and there is a green dot next to the app in the list to indicate an installed status (see below).
- Windows: The Install button toggles to read Uninstall upon clicking Install and there is a green dot next to the app in the list to indicate an installed status (see below).
- Linux: The Install button toggles to read Uninstall upon clicking Install and there is a green dot next to the app in the list to indicate an installed status (see below).
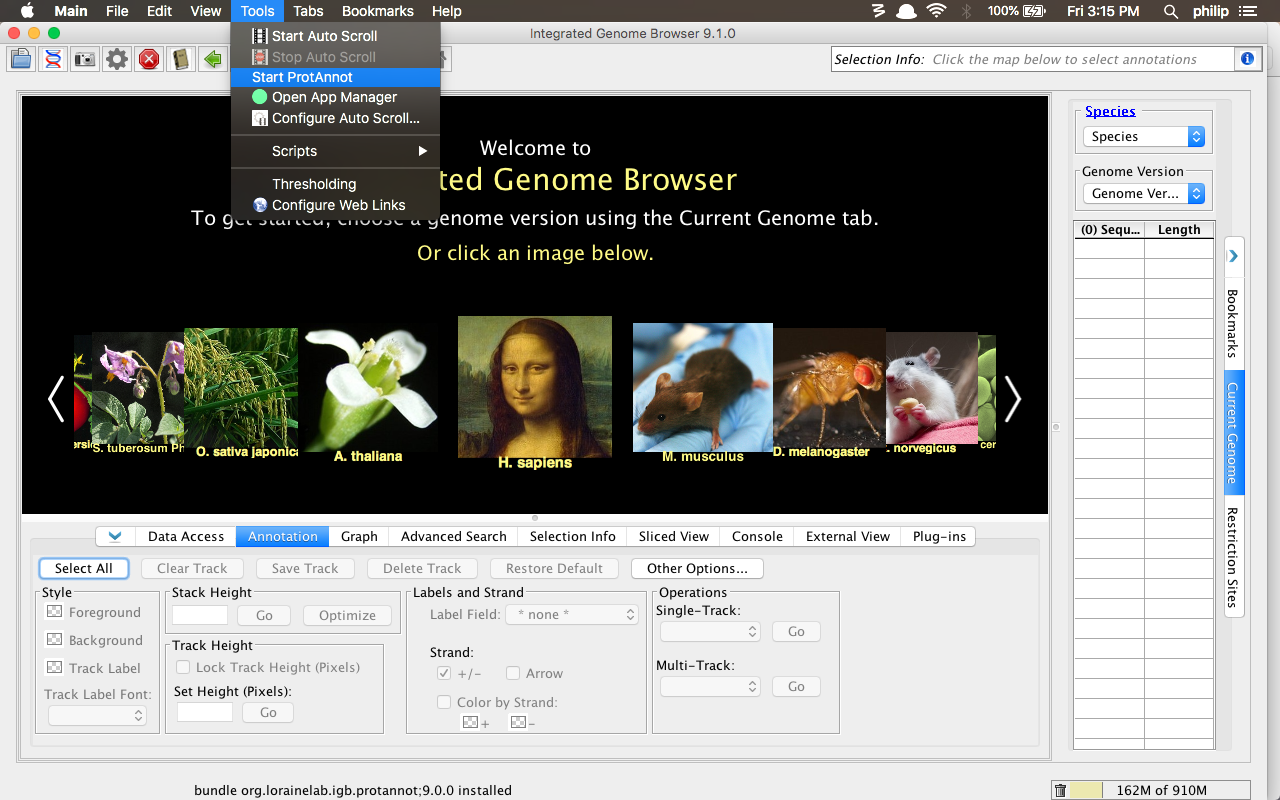
- Mac: When the app is installed, a new Start ProtAnnot option appears in the Tools menu (see below).
- Windows: When the app is installed, a new Start ProtAnnot option appears in the Tools menu (see below).
- Linux: When the app is installed, a new Start ProtAnnot option appears in the Tools menu (see below).
- Uninstall the ProtAnnot app using the IGB App Manager.
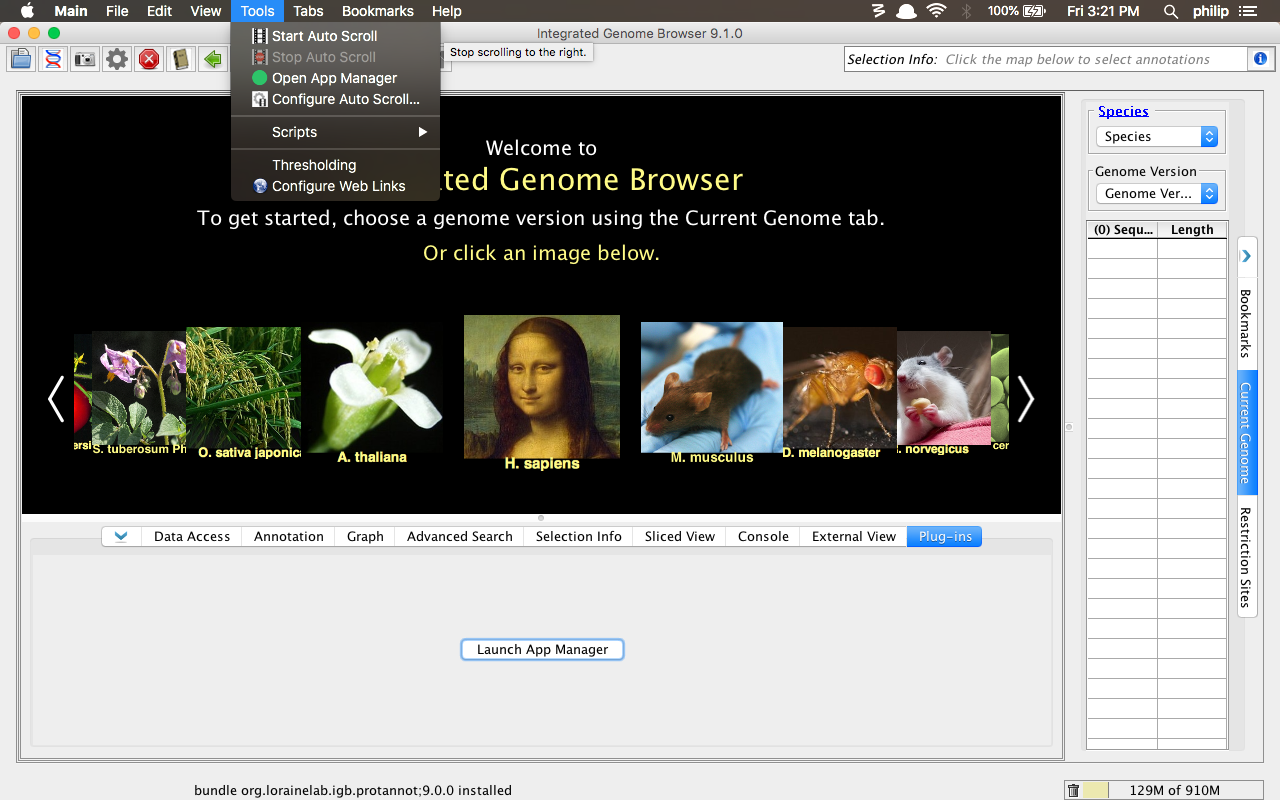
- Mac: When the app is uninstalled, Start ProtAnnot option disappears from the Tools menu (see below).
- Windows: When the app is uninstalled, Start ProtAnnot option disappears from the Tools menu (see below).
- Linux: When the app is uninstalled, Start ProtAnnot option disappears from the Tools menu (see below).
- Close the IGB App Manager and reopen it by selecting Tools > Open App Manager (as seen below).
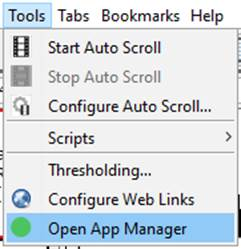
- Mac: The IGB App Manager should open.
- Windows: The IGB App Manager should open.
- Linux: The IGB App Manager should open.
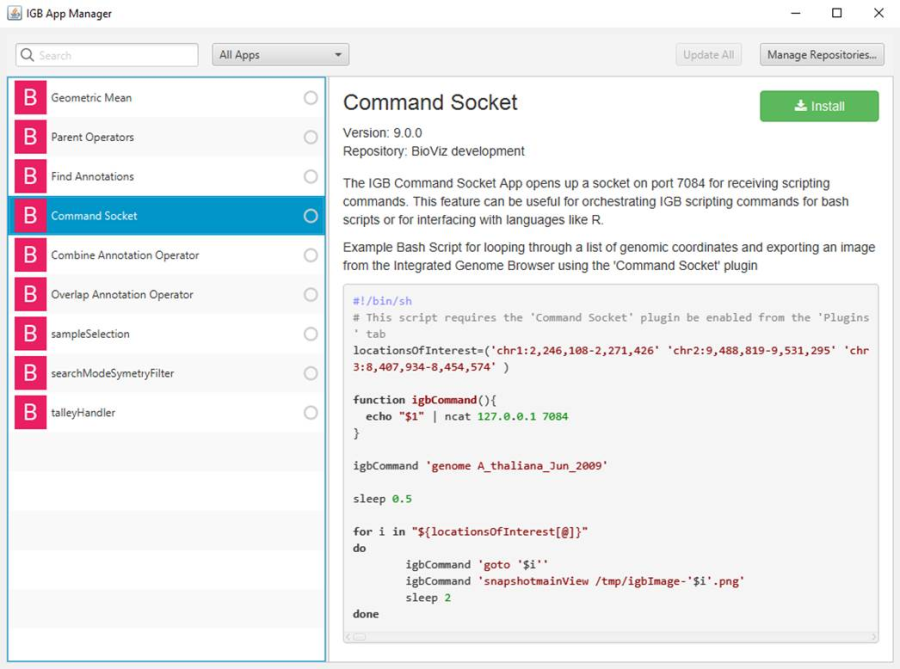
- Select the Command Socket app from the list in the App Manager.
- Mac: The Command Socket app contains content in the App Manager that provides additional details about the app, as seen below (this ensures that the App Manager is using the README files appropriately).
- Windows: The Command Socket app contains content in the App Manager that provides additional details about the app, as seen below (this ensures that the App Manager is using the README files appropriately).
- Linux: The Command Socket app contains content in the App Manager that provides additional details about the app, as seen below (this ensures that the App Manager is using the README files appropriately).
- Install the Command Socket app.
- Click the Manage Repositories button and remove the checks from the checkboxes for all of the repos.
- Mac: The list in the App Manager should update to remove all apps except for installed apps. Ensure that the Command Socket app is still installed (indicated with a green dot next to the app) and that the letter next to the app's name has changed to an "L", to indicate that the app is now installed locally, not from a repo (see below).
- Windows: The list in the App Manager should update to remove all apps except for installed apps. Ensure that the Command Socket app is still installed (indicated with a green dot next to the app) and that the letter next to the app's name has changed to an "L", to indicate that the app is now installed locally, not from a repo (see below).
- Linux: The list in the App Manager should update to remove all apps except for installed apps. Ensure that the Command Socket app is still installed (indicated with a green dot next to the app) and that the letter next to the app's name has changed to an "L", to indicate that the app is now installed locally, not from a repo (see below).
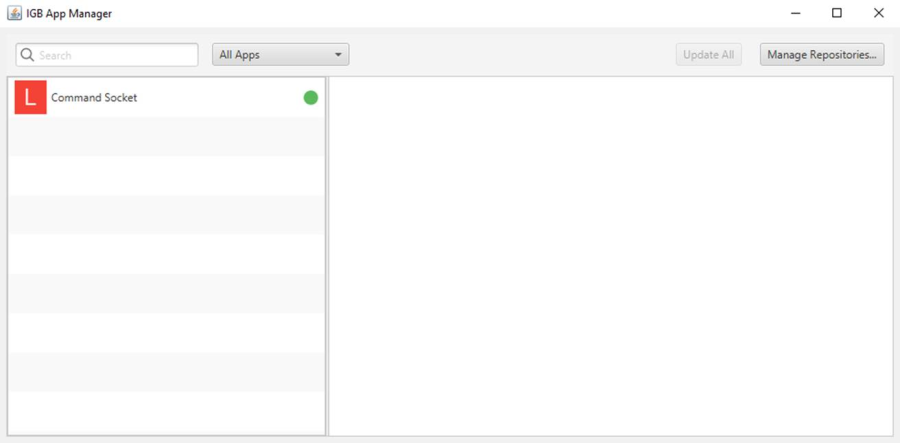
- Once more, click the Manage Repositories button and remove all of the app repos from the App Repositories table by selecting the repo and clicking Remove.
- Mac: The App Manager should not change (it should still display the Command Socket app, installed locally, as seen below).
- Windows: The App Manager should not change (it should still display the Command Socket app, installed locally, as seen below).
- Linux: The App Manager should not change (it should still display the Command Socket app, installed locally, as seen below).
- Finally, uninstall the Command Socket app by selecting it and clicking Uninstall.
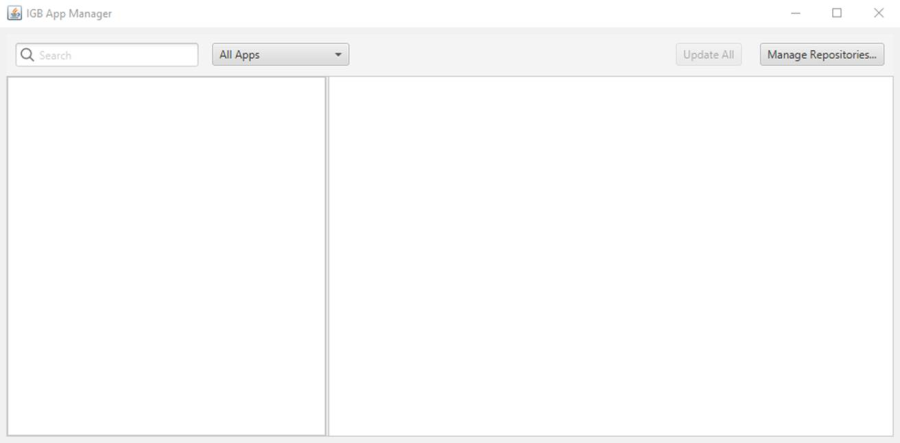
- Mac: The App Manager appears empty (as seen below).
- Windows: The App Manager appears empty (as seen below).
- Linux: The App Manager appears empty (as seen below).