Skip to end of metadata
Go to start of metadata
You are viewing an old version of this page. View the current version.
Compare with Current
View Page History
« Previous
Version 25
Next »
General Function Checklist
- ProtAnnot is launched from IGB
- Install the ProtAnnot plugin through the App Manager (Tools>Open App Manager)
- Select any genome
- Select one or more whole gene model annotation
- Select the Tools Menu
- Select Start ProtAnnot
- Checkpoint
- Your selected gene model(s) should look as follows when loaded into ProtAnnot; take note of the following key items in red:
- The window title
- The ProtAnnot menu
- The navigation and zoom bar
- Th selected gene model(s) name
- The Properties and InterProScan tabs
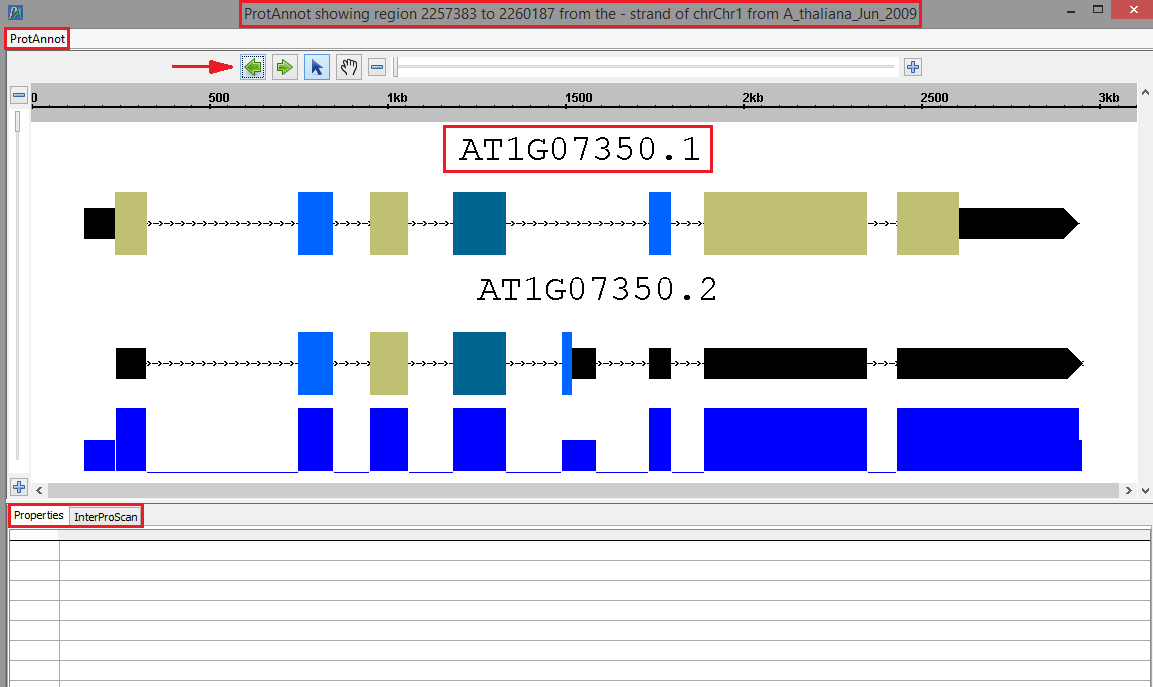
- The ProtAnnot window title should contain the absolute sequence coordinates, strand direction, contig name, and the genome version.

- InterProScan
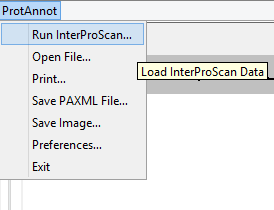
- Select the ProtAnnot menu
- Select Run InterProScan menu item
- Verify that the InterProScan Job Configuration window appears similar to the image below
- Verify correct text wrapping for the information icon
- Verify that the information link directs to the appropriate "About InterPro" page
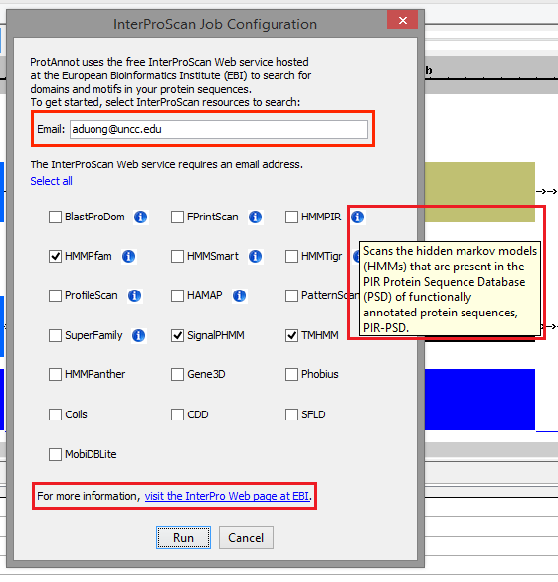
- Select Run
- Select the InterProScan tab
- Verify that all job statuses are completed with a status of FINISHED.

- Clicking on the result cell should open the result xml on the InterProScan website
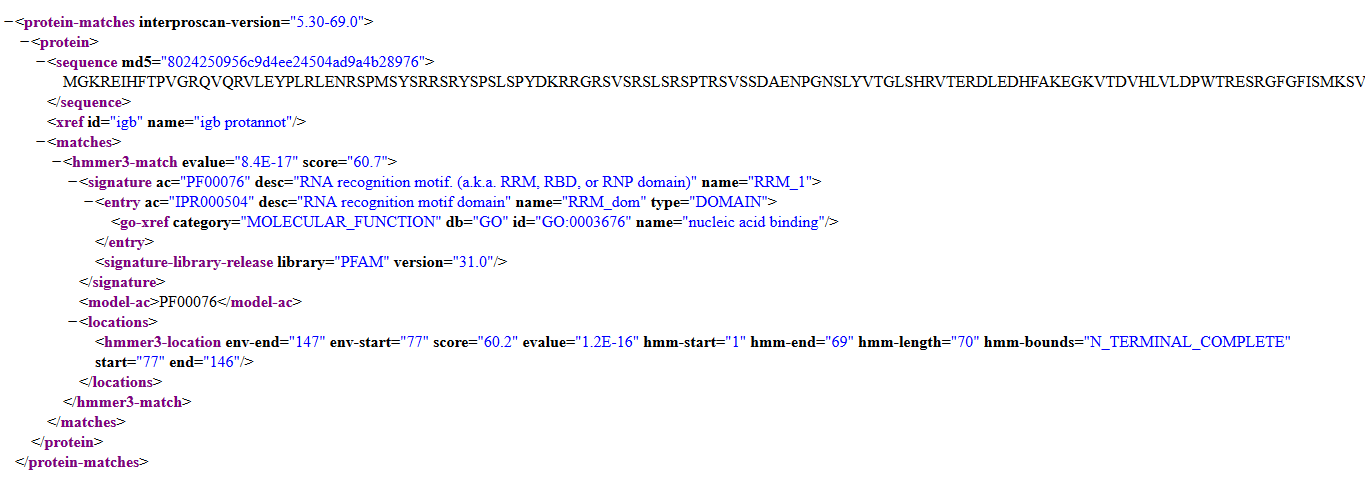
- Select the Properties tab
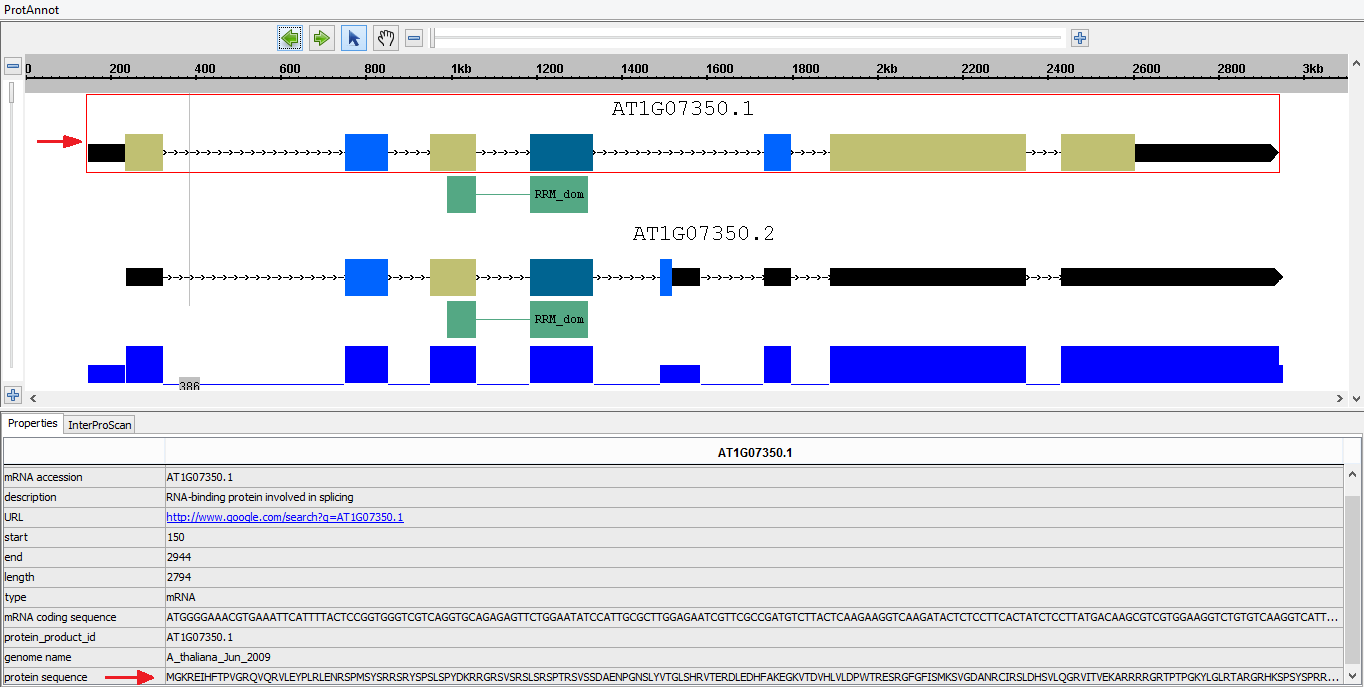
- In the display window, select a gene model to open the Properties tab, and verify that exons have the correct protein sequences.
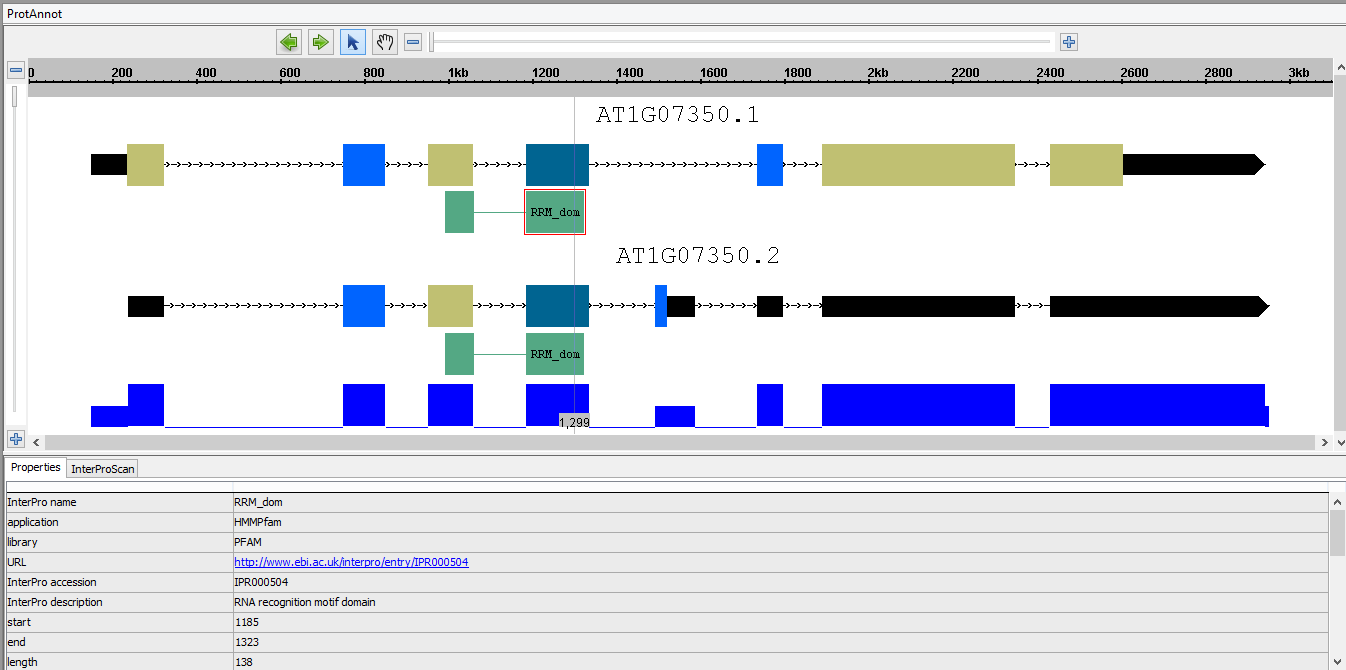
- In the display window, select a protein annotation to open the Properties tab, and verify that the following properties are present and correct:
- Application and library name
- Functional URL link
- Start, end, and length coordinates
- Run the InterProScan again by selecting Run InterProScan under the InterProScan tab
- Once the jobs are running, select Cancel All Jobs under the InterProScan tab
- Verify that job statuses are CANCELLED, and that there are no exceptions in the logs


